
Table of Contents
Introduction (Spiderman Cake)
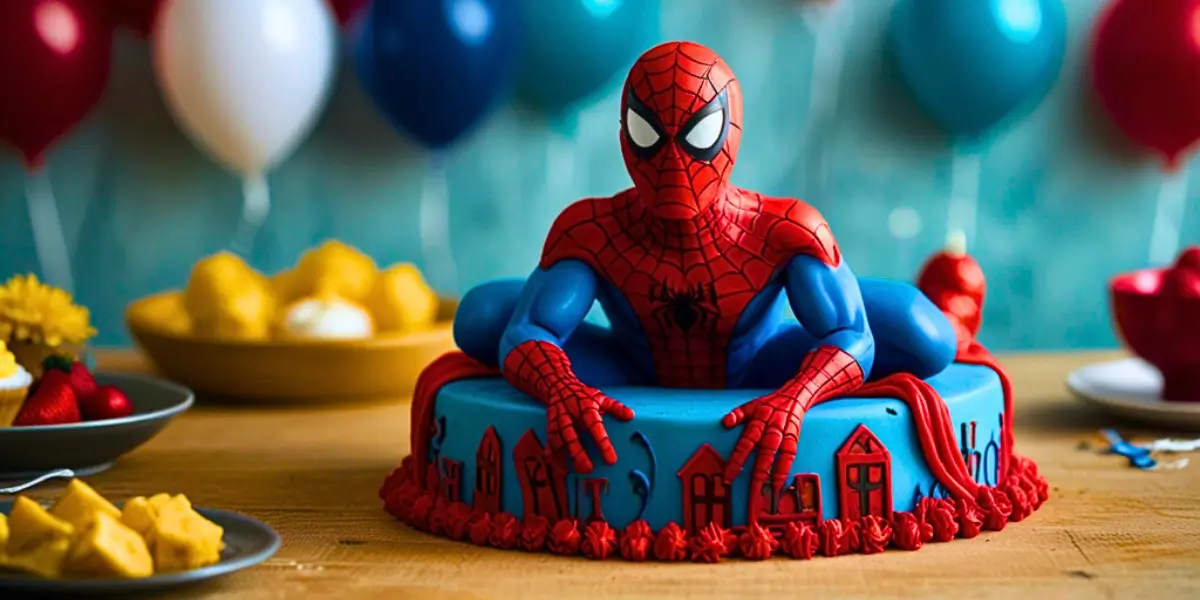
Are you ready to impress your little superhero fans with a cake that’s as striking as Spiderman himself? Whether you’re planning a themed birthday party or just want to surprise someone with their favorite superhero, this Spiderman cake recipe is your ultimate time-saving solution.
With a few clever tricks and easy-to-find ingredients, you’ll create a show-stopping centerpiece that’s both fun to make and guaranteed to wow your guests. Don’t worry if you’re new to cake decorating—this guide is packed with tips to ensure success, even for beginners. Let’s dive into the world of web-slinging sweetness and bring Spiderman to life on your dessert table!
Key Benefits
Making a Spiderman-themed cake might sound daunting, but this recipe simplifies the process with clever tricks that save time without compromising on the “wow” factor. Whether you’re a busy parent planning a superhero birthday party or a beginner stepping into the world of themed cake decorating, this guide has you covered.
Here’s why this recipe is a game-changer:
- Time-Saving Techniques: From pre-made edible toppers to easy web design stencils, you’ll cut down on decorating time while still achieving a professional look.
- Beginner-Friendly Steps: Even if you’ve never decorated a cake before, these simple instructions ensure foolproof results.
- Customizable Designs: Personalize the cake with different colors, toppings, or shapes to match your celebration’s unique vibe.
- Kid-Approved Fun: The vibrant red and blue colors and iconic Spiderman elements are sure to delight any young superhero fan.
- Versatility: This recipe works for various occasions, from birthdays to movie nights or even just a fun baking day with the kids.
By following these tips, you’ll create a Spiderman cake that’s not only stunning but also a true conversation starter. Ready to sling some webs and wow your guests? Let’s get started!
Ingredients
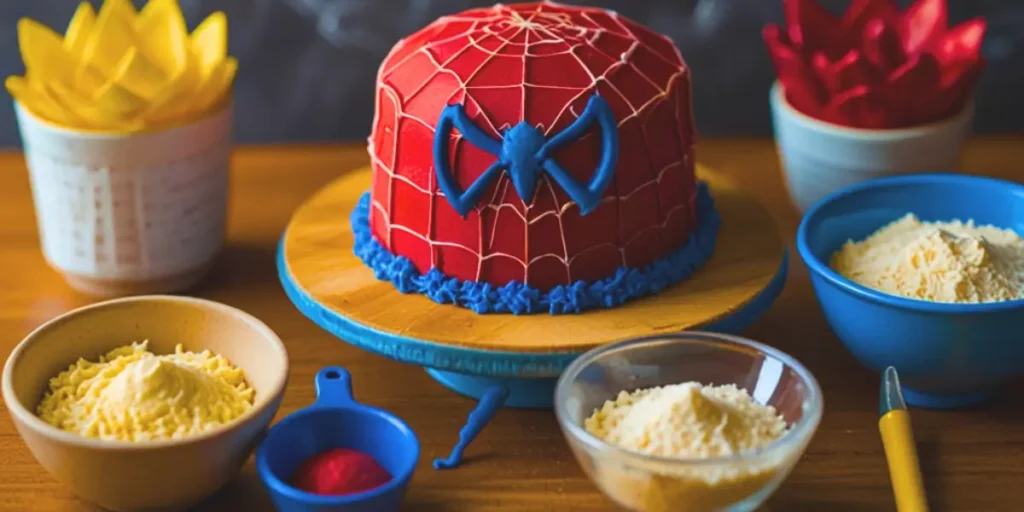
Gathering the right ingredients is the first step to creating a jaw-dropping Spiderman cake. Here’s everything you’ll need to bring this superhero masterpiece to life:
For the Cake:
- 2 ½ cups (315g) all-purpose flour – The foundation for a soft, moist cake.
- 1 ¾ cups (350g) granulated sugar – Adds the perfect level of sweetness.
- 1 cup (240ml) milk – Ensures the batter is smooth and creamy.
- ¾ cup (180ml) vegetable oil – Keeps the cake tender and moist.
- 3 large eggs – Provides structure and richness.
- 2 tsp baking powder – Helps the cake rise beautifully.
- ½ tsp salt – Balances the flavors.
- 1 tbsp vanilla extract – Enhances the cake’s flavor profile.
- Red and blue food coloring – Essential for creating Spiderman’s iconic colors.
For the Frosting:
- 2 cups (450g) unsalted butter, softened – The base for a creamy, spreadable frosting.
- 4 cups (500g) powdered sugar – Adds sweetness and structure.
- 3-4 tbsp milk or heavy cream – Adjusts the consistency.
- 1 tsp vanilla extract – Complements the frosting’s flavor.
- Black gel food coloring – For web details and accent designs.
Decorations:
- Edible Spiderman toppers – A quick and easy way to add character.
- Piping bags and tips – For precision in decorating.
- Web design stencils – Saves time while achieving a professional look.
- Optional: Edible glitter or candy sprinkles – Adds extra flair to the finished cake.
Ingredient Tips:
- Short on time? Swap homemade Spiderman cake with a high-quality store-bought mix for convenience.
- Dietary adjustments? Substitute milk with a dairy-free option or use gluten-free flour for specific needs.
With these ingredients at your fingertips, you’re all set to create a Spiderman cake that’s as stunning as it is delicious. Let’s move on to the fun part—putting it all together!
Instructions
Let’s dive into making your Spiderman cake! Whether you’re a seasoned baker or just getting started, this recipe is simple, fun, and guaranteed to impress. Here’s how to create the perfect Spiderman cake with ease and a little bit of superhero flair!
Step 1: Baking the Cake Layers
- Preheat Your Oven: Start by preheating your oven to 350°F (175°C). Grease and line two 9-inch round cake pans with parchment paper to make the cake layers easy to remove after baking.
- Mix the Dry Ingredients: In a large mixing bowl, whisk together the all-purpose flour, granulated sugar, baking powder, and salt. This ensures that the dry ingredients are evenly combined before adding the wet ingredients.
- Add Wet Ingredients: To the dry ingredients, add the milk, vegetable oil, eggs, and vanilla extract. Mix everything together using a hand mixer or a whisk until the batter is smooth and creamy.
- Divide and Color the Batter: Once your batter is smooth, divide it into two bowls. Add red food coloring to one bowl and blue food coloring to the other. Stir well until the colors are evenly distributed.
Step 2: Bake the Cake
- Pour the Batter into the Pans: Pour the red batter into one prepared pan and the blue batter into the other. Spread it evenly with a spatula to ensure uniform baking.
- Bake the Cakes: Place both pans in the oven and bake for 25-30 minutes. To check if they’re done, insert a toothpick into the center of the cakes—if it comes out clean, they’re ready to come out.
- Cool the Cakes: Allow the cakes to cool in the pans for about 10 minutes before transferring them to a wire rack to cool completely.
Step 3: Prepare the Frosting
- Beat the Butter: In a large bowl, beat the softened butter until it’s light and fluffy. This will take about 3-4 minutes, and it helps create a smooth, creamy frosting.
- Add Powdered Sugar: Gradually add powdered sugar, one cup at a time, beating well after each addition to avoid clumps.
- Flavor and Adjust Consistency: Add vanilla extract and 3 tablespoons of milk or heavy cream to the frosting. Beat until smooth. If the frosting is too thick, add more milk, a little at a time, until you reach the perfect spreading consistency.
- Divide and Color the Frosting: Divide the frosting into three bowls. Color one batch red, another blue, and leave the third batch black for the spiderweb design.
Step 4: Assemble the Cake
- Layer the Cakes: Place the blue cake layer onto your serving plate. Spread a generous amount of red frosting on top of it.
- Stack the Layers: Place the red Spiderman cake layer on top of the frosted blue cake. You can also spread a thin layer of frosting between the two layers to help them stick together.
- Crumb Coat the Cake: Apply a thin, even layer of frosting over the entire cake to catch any crumbs. Chill the cake for 20-30 minutes in the fridge to set the crumb coat before applying the final layer of frosting.
- Final Coat of Frosting: After the crumb coat has firmed up, apply a smooth, even layer of red frosting to cover the entire cake.
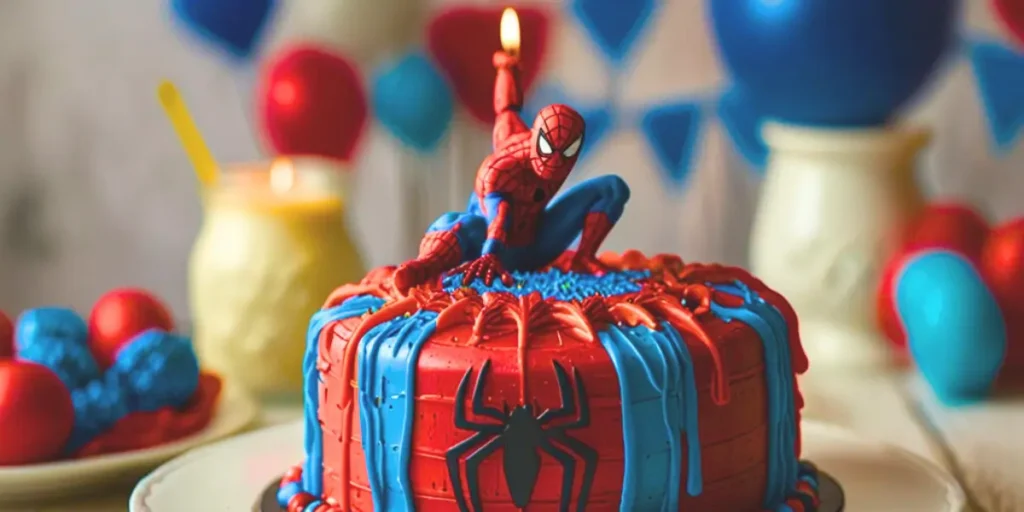
Step 5: Decorate the Cake
- Create the Spiderweb Design: Fill a piping bag with black frosting and pipe a spiderweb design on top of the cake. Start from the center of the cake and work your way out in a spiral pattern.
- Add Spiderman Toppers: For that extra touch, add edible Spiderman-themed toppers or even pipe Spiderman’s face or logo on the cake using additional frosting.
- Final Touches: For a little sparkle, sprinkle edible glitter around the base or add some fun, colorful sprinkles for a superhero-worthy finish.
Now you’ve got a stunning Spiderman cake that will wow everyone! With these easy steps, you can create a cake that’s not only visually impressive but also delicious. Enjoy the process, and don’t forget to share your creation with friends and family!
Pro Tips and Variations
Making the perfect Spiderman cake doesn’t have to be complicated, and with a few pro tips, you’ll elevate your cake-decorating game to a whole new level! Whether you’re looking to customize the design, save time, or add a unique twist, these tips will help you create a cake that’s both stunning and delicious.
Pro Tips:
- Use Gel Food Coloring: For vibrant, true-to-life red and blue colors, opt for gel food coloring instead of liquid. Gel colors provide a deeper, richer hue without affecting the consistency of the batter.
- Level the Cake Layers: After baking, you may notice that the tops of your cakes have domed. To ensure your layers stack evenly, use a serrated knife to level the tops. This also helps the frosting go on more smoothly.
- Chill the Cake Between Layers: If you find that your frosting is melting too quickly or becoming difficult to spread, place the cake in the fridge between steps. Chilling the cake helps firm up the frosting and gives you more control while decorating.
- Add Texture to the Spiderweb: If you want your spiderweb design to have a more realistic, web-like texture, use a toothpick to drag the black frosting from the center to the outer edges of the web. This creates a delicate, spiderweb effect that really pops.
Variations:
- Flavors: While the classic vanilla cake is always a hit, consider experimenting with different flavors. A rich chocolate cake or a fun strawberry cake could be great alternatives to the traditional vanilla base.
- Frosting Flavors: Mix up the frosting flavor to complement your cake. For a twist, try adding a touch of cocoa powder to your frosting for a chocolatey layer that pairs perfectly with the colors. You can also experiment with a cream cheese frosting for a tangy flavor.
- Decorative Elements: Add a more personal touch by customizing the cake with edible images of Spiderman or even Spiderman action figures as cake toppers. You can also add edible glitter for a touch of superhero magic!
Time-Saving Tips:
- Make Ahead: You can prepare the cake layers a day ahead of time. Once they’ve cooled, wrap them tightly in plastic wrap and store them at room temperature. This will save you time on the day of assembly, allowing you to focus on the decorating!
- Pre-Color the Frosting: Prepare and color your frosting ahead of time, and store it in the fridge. This way, when you’re ready to decorate, you’ll have everything prepped and ready to go.
- Simplify the Design: If you’re short on time, you can simplify the design by creating just a basic spiderweb or simply decorating the top with a Spiderman-themed topper. You don’t have to go all-out with intricate details to make the cake look amazing!
With these pro tips and creative variations, you’ll have everything you need to make a memorable Spiderman cake that’s sure to impress your guests. Whether you’re keeping it classic or adding a fun twist, your cake will be the star of the party!
Serving Suggestions
Your Spiderman cake is now ready to be the centerpiece of any celebration! Whether you’re serving it at a superhero-themed birthday party, a family gathering, or just a fun treat for the kids, here are some creative and practical serving suggestions to make your cake even more special.
1. Themed Party Presentation
- Superhero Vibes: Set the mood by creating a Spiderman-themed dessert table. Decorate the table with red, blue, and black colors to match your cake’s theme. You could add small Spiderman figurines or use a Spiderman cake stand to elevate the presentation.
- Personalized Cake Slices: If you’re serving guests at a party, consider cutting the cake into fun shapes. Using a cookie cutter, you can create Spiderman mask-shaped slices for an extra touch of creativity.
2. Pair with Themed Drinks
- Spiderman Smoothie: Serve the cake with a red and blue fruit smoothie! Blend together strawberries and blueberries with some yogurt or almond milk, and you’ll have a fun, complementary drink to go with your cake.
- Sparkling Juice: For an extra burst of fun, serve sparkling red or blue juice (like sparkling lemonade or blueberry soda) to add some fizz to the party.
3. Smaller Portions for Easy Serving
- Cupcake Style: If you’re serving a large group, consider turning the Spiderman cake into cupcakes. Simply use the same batter and bake individual cupcakes instead of one large cake. Frost each with red and blue icing and top with a mini edible spiderweb.
- Cake Pops: Another fun way to serve individual portions is by making Spiderman cake pops. Crumble the cake, mix with frosting, form into small balls, and dip in the appropriate colored chocolate coating. Finish with a spiderweb design on top.
4. Add Fun Side Treats
- Spiderweb Cookies: Complement your Spiderman cake with some easy-to-make spiderweb cookies. Decorate cookies with a simple black icing spiderweb design and serve them alongside the cake for an extra touch of sweetness.
- Fruit Skewers: If you want to balance out the cake’s sweetness, offer some fresh fruit skewers with red and blue fruits like strawberries, blueberries, and grapes. The colorful fruit will tie into the Spiderman theme while providing a lighter option.
5. Storage and Leftovers
- Storing Leftovers: If you have any leftover cake, store it in an airtight container in the fridge for up to 3-4 days. The cake will stay fresh and moist, perfect for a late-night snack or sharing with friends the next day.
- Freezing: Want to save some cake for later? Wrap individual slices tightly in plastic wrap and store them in a freezer-safe bag. Frozen cake can last up to 2-3 months, so you can enjoy your Spiderman creation at a later time!
With these serving suggestions, your Spiderman cake will be a hit no matter the occasion. From themed drinks to fun side treats, you’ll have everything you need to make the day unforgettable. Enjoy sharing your superhero masterpiece with friends and family!
Conclusion
Whether you’re an experienced baker or a beginner in the kitchen, making a Spiderman cake is a fun and rewarding project. This cake offers the perfect combination of creativity and deliciousness, making it an ideal treat for birthday parties, themed events, or just because! By following the simple steps and using a few of our pro tips, you’ll be able to create a cake that’s as impressive as it is tasty.
The best part about this Spiderman cake is how versatile it can be. From the cake flavor to the frosting, you can personalize it to suit your taste or your guests’ preferences. Plus, with its striking design and superhero flair, this cake will surely become the centerpiece of your celebration.
Whether you’re serving it up for a party full of Spiderman cake fans or just looking for a fun baking project, this cake is bound to bring smiles and excitement to the table. So, get ready to impress your friends and family with a Spiderman cake that’s as heroic as the web-slinging superhero himself!
Enjoy your baking adventure, and may your Spiderman cake be a showstopper at your next gathering!
FAQs
Creating the perfect Spiderman cake is a fun and rewarding experience, but we understand that questions may arise along the way. To help you out, we’ve compiled some of the most frequently asked questions to guide you through the process. Let’s dive in!
1. Can I use a store-bought cake mix for this recipe?
Yes! If you’re short on time, you can definitely use a store-bought cake mix to save time on preparation. Just follow the instructions on the box, and then proceed with the frosting and decoration as directed. Using a cake mix doesn’t compromise the fun or flavor of the cake—it’s all about the design!
2. How can I make the Spiderweb design more detailed?
If you want to add more intricate detail to your spiderweb design, use a piping bag with a fine tip to create the web pattern. You can even use a toothpick to gently drag the black frosting into the web shape, creating a more delicate, professional-looking design. For an even more dynamic effect, try adding edible glitter or sparkles around the web for a fun, festive touch!
3. Can I make this cake in advance?
Absolutely! You can bake the Spiderman cake layers a day in advance and store them in an airtight container at room temperature. If you want to save even more time, you can also prepare and color your frosting ahead of time, keeping it in the fridge until you’re ready to decorate. Just make sure to let the frosting come to room temperature before using it.
4. How do I store leftover Spiderman cake?
To keep your Spiderman cake fresh, store any leftovers in an airtight container at room temperature for up to 3-4 days. If you want to keep it longer, you can freeze individual slices by wrapping them tightly in plastic wrap and placing them in a freezer-safe bag. Frozen cake can last up to 2-3 months.
5. Can I change the frosting flavors?
Yes, you can! While classic buttercream frosting is always a hit, feel free to experiment with other flavors. Try a chocolate buttercream or cream cheese frosting for a different twist. You could even incorporate some vanilla or almond extract for an extra burst of flavor in your frosting.
6. What if I can’t find black frosting?
If you don’t have black frosting, you can easily make it by mixing gel food coloring into your white frosting. Start with a small amount of black gel food coloring, and gradually add more until you achieve the desired shade. Gel colors are more concentrated, so you won’t need as much, and they won’t affect the texture of the frosting.
7. Can I make a gluten-free version of this Spiderman cake?
Yes! You can swap the regular flour for a gluten-free flour blend to make a gluten-free version of this cake. Be sure to follow any additional instructions on the flour package for best results. Gluten-free cakes may have a slightly different texture, but they’ll still be delicious and fun to decorate.
These FAQs should help address any concerns you may have while making your Spiderman cake. If you have any more questions, don’t hesitate to reach out—baking is all about creativity, and we’re here to help you make the most out of your superhero-themed cake!